
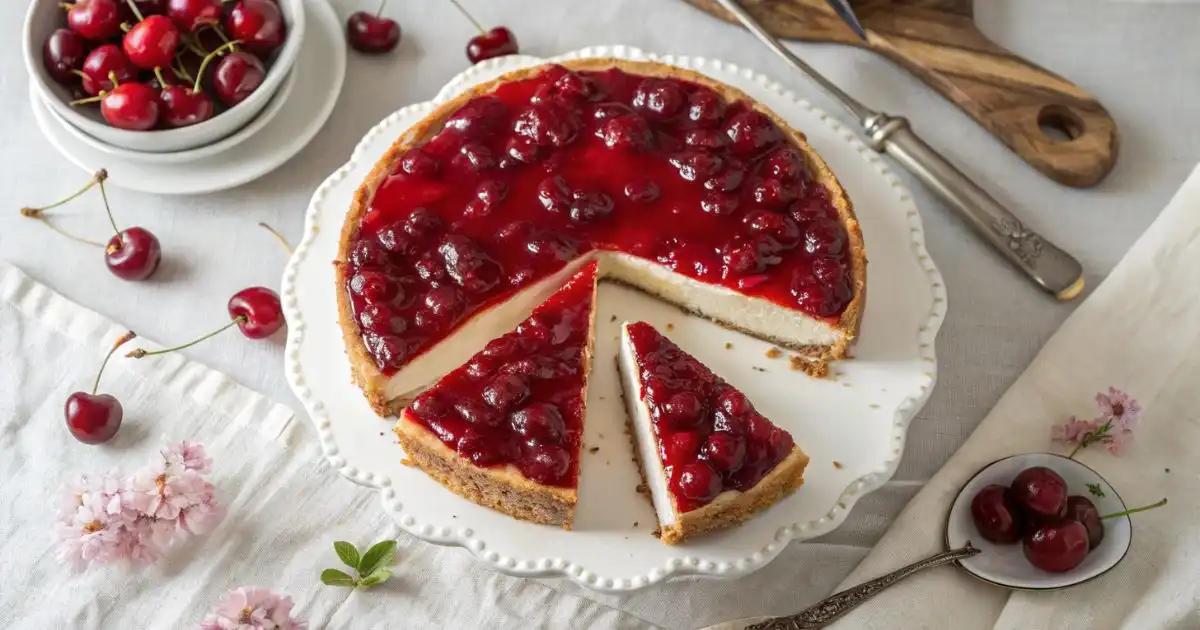
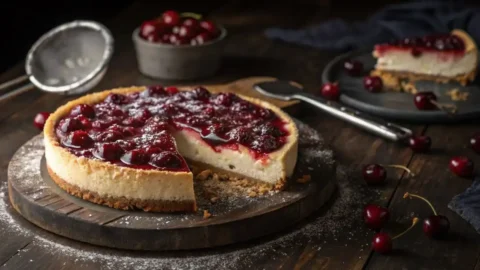
Easy Cherry Cheesecake Recipe (Baked & No-Bake Versions)
There’s a specific kind of craving, the one where only cherry cheesecake Recipe will do. Sweet, tangy cherries pooling over a velvety, cloud-white filling, resting on a buttery, golden crust. You deserve that. And this guide will get you there.
But not all cheesecakes are created equal. Are you looking for that light, mousse-like filling you can throw together on a Tuesday without turning on the oven? Or do you want a dense, restaurant-style showstopper that slices cleanly and earns a standing ovation at the dinner table?
This is your complete guide to both. We cover the No-Bake Cherry Cheesecake, airy, quick, and brilliant for warm evenings, and the Classic Baked Cherry Cheesecake, rich, silky, and deeply satisfying. One universal crust. Two glorious methods. Endless reasons to make it this weekend.
Table of Contents
Baked vs. No-Bake: Which Should You Choose?
Before you grab your cream cheese, let’s settle the debate. The right choice comes down to your timeline, your confidence in the kitchen, and the texture you’re dreaming of.
| Factor | No-Bake Cherry Cheesecake | Baked Cherry Cheesecake |
|---|---|---|
| Texture | Light, fluffy, mousse-like — like a chilled cloud | Dense, velvety, rich — classic NYC-style slice |
| Active Prep Time | ~20 minutes | ~30 minutes |
| Total Time | 4–6 hours (chill time) | 5–7 hours (bake + cool + chill) |
| Difficulty | Beginner-friendly | Intermediate |
| Oven Required? | Only for crust (optional) | Yes — 325°F / 165°C |
| Best For | Summer, warm weather, last-minute desserts | Dinner parties, entertaining, special occasions |
| Freezer Friendly? | Yes — up to 2 months | Yes — up to 3 months |
| Signature Flavor | Bright, tangy, cool | Deep, buttery, complex |
Quick tip: Pressed for time or a first-time baker? Go No-Bake. Hosting a dinner party and want to impress? Go Baked. Can’t decide? Make the No-Bake tonight and bookmark the Baked for the weekend.
The Universal Graham Cracker Crust
Here’s the good news: you only need to learn one crust. This buttery, golden base works perfectly for both versions. The secret is pressing it in firmly; a loose crust crumbles when you slice.
Ingredients:
- 1½ cups graham cracker crumbs (about 12 full sheets)
- 6 tablespoons unsalted butter, melted
- 3 tablespoons granulated sugar (white or brown)
- Pinch of fine sea salt
How to Make the Crust
- 1. Pulse graham crackers in a food processor until fine and sandy. No processor? Place them in a zip-lock bag and crush with a rolling pin.
- 2. Combine the crumbs with melted butter, sugar, and salt in a bowl. Mix until the mixture resembles wet sand and holds together when pressed between your fingers.
- 3. Pour into a 9-inch springform pan. Press firmly across the bottom and about 1 inch up the sides using the flat bottom of a measuring cup. Apply real pressure, especially where the crust meets the sides. A packed crust holds together; a loose one collapses at the first slice.
- 4. For No-Bake: Refrigerate for 30 minutes to set. For Baked: Bake at 325°F (165°C) for 8–10 minutes until lightly golden. Cool completely before adding filling.
Method 1: The No-Bake Cherry Cheesecake Recipe (Easy & Mousse-Like)
Prep Time: 20 mins
Chill Time: 4-6 hours
Difficulty: Easy/Beginner
Best for: Hot summer days, beginners, and last-minute desserts.
This version is deceptively simple. The magic ingredient is heavy whipping cream, whipped to stiff peaks and gently folded into the cream cheese mixture. That folding technique — not mixing- is what creates that impossibly light, airy texture. Think: cheesecake that feels like eating a luscious, tangy cloud.
Ingredients:
- 16 oz (450g) full-fat block cream cheese, room temperature
- 1 cup heavy whipping cream, cold
- ¾ cup powdered sugar, sifted
- 1 teaspoon pure vanilla extract
- 2 tablespoons fresh lemon juice
- Pinch of fine sea salt
Step-by-Step Instructions
- 1. Beat the room-temperature cream cheese with an electric mixer on medium-high for 2–3 minutes until completely smooth and fluffy. Scrape the bowl down. Any lumps now will remain lumps in your finished cheesecake.
- 2. Add the powdered sugar, vanilla extract, lemon juice, and salt. Beat on medium until fully combined and silky smooth, about 1 minute.
- 3. In a separate cold bowl (chilling it in the freezer for 5 minutes helps), whip the cold heavy cream to stiff peaks; it should hold a firm point when the beaters are lifted.
- 4. Fold gently: Add the whipped cream to the cream cheese mixture in two additions. Use a rubber spatula and a wide, scooping motion, fold from the bottom up, and rotate the bowl. Stop the moment the streaks disappear. Over-mixing deflates all that glorious air.
- 5. Pour the filling into the prepared, chilled crust and smooth the top with a spatula.
- 6. Refrigerate uncovered for at least 4–6 hours, preferably overnight. The longer it chills, the cleaner it will slice.
No-Bake Cherry Cheesecake
Ingredients
Cheesecake Filling
- 16 oz full-fat cream cheese room temperature
- 1 cup heavy whipping cream cold
- 0.75 cup powdered sugar sifted
- 1 teaspoon pure vanilla extract
- 2 tablespoons fresh lemon juice
- 1 pinch fine sea salt
Instructions
- Beat the room-temperature cream cheese with an electric mixer on medium-high for 2–3 minutes until completely smooth and fluffy. Scrape the bowl down to remove any lumps.
- Add the powdered sugar, vanilla extract, lemon juice, and salt. Beat on medium until fully combined and silky smooth, about 1 minute.
- In a separate cold bowl (chilled in the freezer for 5 minutes), whip the cold heavy cream to stiff peaks; it should hold a firm point when the beaters are lifted.
- Fold gently: Add the whipped cream to the cream cheese mixture in two additions. Use a rubber spatula and a wide, scooping motion, fold from the bottom up, and rotate the bowl. Stop the moment the streaks disappear.
- Pour the filling into the prepared, chilled crust and smooth the top with a spatula.
- Refrigerate uncovered for at least 4–6 hours, preferably overnight, for best slicing results.
Notes
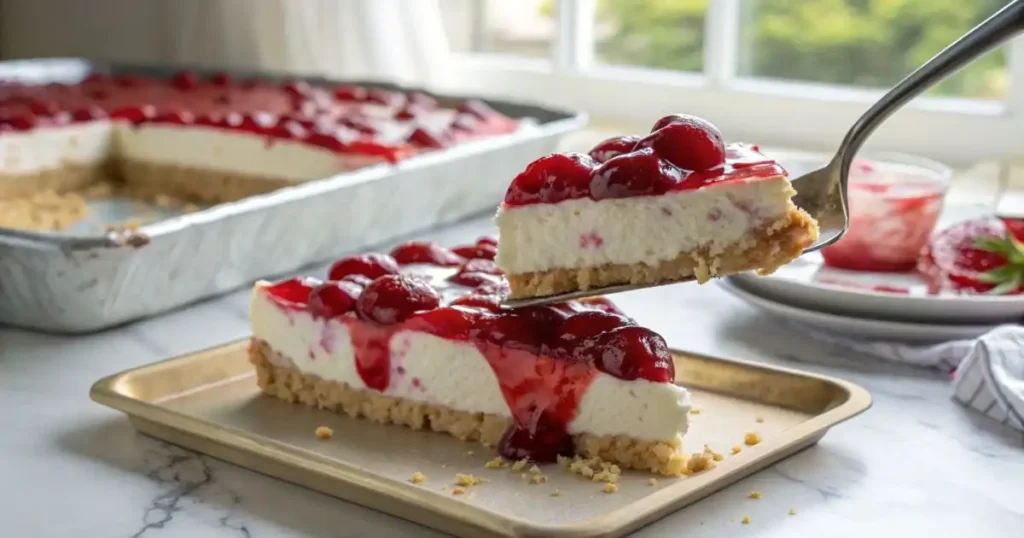
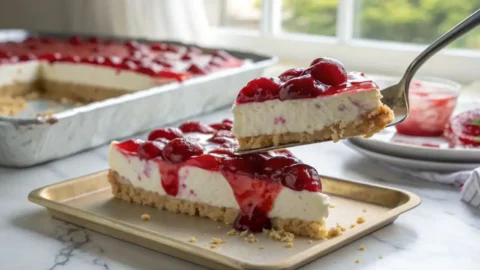
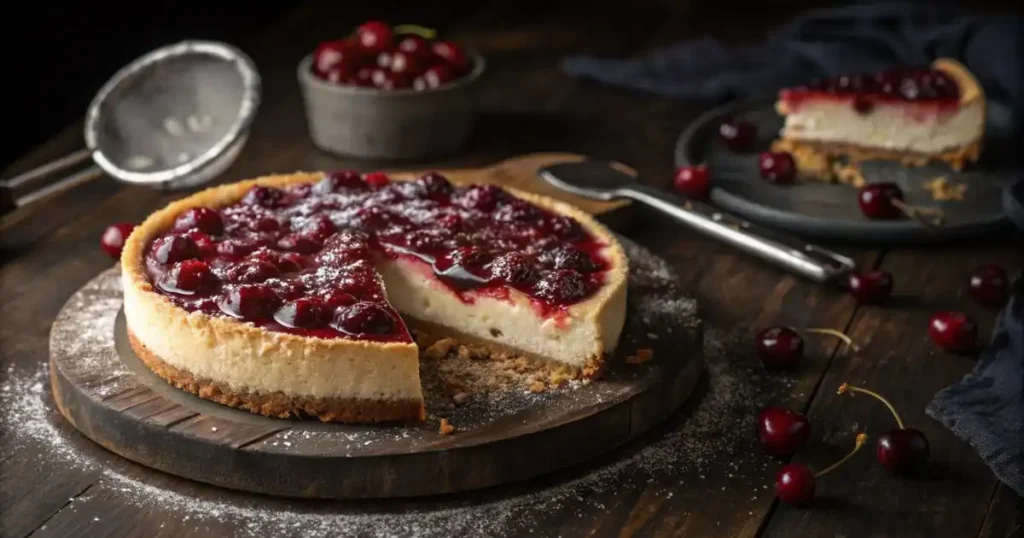
Method 2: The Classic Baked Cherry Cheesecake Recipe (NY Style)
Prep Time: 30 mins
Cook Time: 60 mins
Cooling: 2 hours
Difficulty: Intermediate
Best for: Dinner parties, special occasions, texture lovers.
This is the heavyweight champion of cheesecakes. Eggs provide structure and richness, while sour cream adds a subtle tanginess and creates that signature, luxurious texture that holds a perfect slice. Patience is the only special skill required; slow and steady wins the race.
Ingredients:
- 24 oz (680g) full-fat block cream cheese, room temperature
- ¾ cup granulated sugar
- 3 large eggs, room temperature
- ½ cup full-fat sour cream, room temperature
- 2 tablespoons all-purpose flour
- 1 teaspoon pure vanilla extract
- 1 tablespoon fresh lemon juice
- Pinch of fine sea salt
Step-by-Step Instructions
- 1. Preheat your oven to 325°F (165°C). Make sure all ingredients are genuinely at room temperature; cold cream cheese causes lumps; cold eggs deflate your batter.
- 2. Beat the cream cheese alone on medium speed for 2–3 minutes until completely smooth. Add the sugar and beat another minute. Scrape the bowl.
- 3. Add the flour, vanilla, lemon juice, and salt. Mix on low until just combined.
- 4. Add the sour cream and mix on low until smooth.
- 5. Add eggs one at a time, mixing on the lowest speed after each addition only until the yolk disappears. This step is critical; over-beating eggs after they’re added incorporates too much air and leads to cracks.
- 6. Pour the silky batter over the cooled crust. Tap the pan gently on the counter 3–4 times to release any air bubbles.
- 7. Bake for 55–65 minutes. The edges should look set and slightly puffed. The center 2–3 inches should still have a gentle wobble, like Jell-O, not liquid.
- 8. The critical cooling step: Turn off the oven. Crack the door open about an inch (prop it with a wooden spoon). Let the cheesecake cool inside the oven for 1 full hour. This gradual temperature change is your best defense against cracking.
- 9. Remove from the oven, run a thin knife around the edge, and cool to room temperature on the counter (about 1 hour). Then refrigerate for a minimum of 4 hours, or overnight is ideal.
Why Cheesecakes Crack and How to Fix It
Cracks are the number-one baked cheesecake fear. Here’s the truth: they happen for three reasons.
1. Over-beating the eggs: Too much air expands in the oven, then collapses as the cheesecake cools.
2. Overbaking: Always pull the cheesecake while the center still has a slight wobble.
3. Rapid temperature change: Always use the oven-door cooling method described in Step 8 above.
Already cracked? Don’t panic. The cherry topping covers everything beautifully. Or smooth a thin layer of sour cream into the crack before it fully sets. A crack is a cosmetic issue only; the flavor is still absolutely divine.
Classic Baked Cherry Cheesecake
Ingredients
Cheesecake Filling
- 24 oz full-fat cream cheese room temperature
- 0.75 cup granulated sugar
- 3 large eggs room temperature
- 0.5 cup full-fat sour cream room temperature
- 2 tablespoons all-purpose flour
- 1 teaspoon pure vanilla extract
- 1 tablespoon fresh lemon juice
- 1 pinch fine sea salt
Instructions
- Preheat your oven to 325°F (165°C). Ensure all ingredients are at room temperature to prevent lumps and deflation.
- Beat the cream cheese alone on medium speed for 2–3 minutes until smooth. Add the sugar and beat another minute. Scrape the bowl.
- Add flour, vanilla, lemon juice, and salt. Mix on low until just combined.
- Add sour cream and mix on low until smooth.
- Add eggs one at a time, mixing on the lowest speed after each addition just until the yolk disappears.
- Pour batter over the cooled crust. Tap the pan gently on the counter 3–4 times to release air bubbles.
- Bake for 55–65 minutes. Edges should look set and slightly puffed, center should wobble gently.
- Turn off oven, crack door open 1 inch (prop with wooden spoon). Let cheesecake cool inside for 1 hour.
- Remove from oven, run knife around edge, cool to room temperature on counter (~1 hour), then refrigerate 4+ hours or overnight.
Notes
The Cherry Topping (Canned vs. Homemade)
The shiny, lacquered cherry topping is the crown jewel. The great news: canned cherry pie filling works wonderfully, and there’s a simple two-minute trick that elevates it dramatically.
Upgrading Canned Cherry Pie Filling (2-Minute Trick)
Open your can and stir in 1 teaspoon of fresh lemon juice and ½ teaspoon of pure vanilla extract. That’s it. The lemon brightens the flavor and cuts through the sweetness; the vanilla adds depth that makes it taste homemade. For an extra layer of flavor, try a tiny pinch of cinnamon or a small splash of almond extract; both are exceptional with cherries.
Quick Homemade Cherry Sauce (15 Minutes)
- 1. Combine 2 cups pitted fresh or frozen cherries, ¼ cup sugar, 2 tablespoons lemon juice, and 2 tablespoons water in a small saucepan over medium heat.
- 2. Stir and cook until the cherries soften and release their deep, ruby juices, about 8 minutes.
- 3. Mix 1 tablespoon of cornstarch with 1 tablespoon of cold water and stir the mixture into the pan. Cook 2 more minutes until thick and glossy.
- 4. Cool completely before spooning over your cheesecake. Warm topping will melt the surface of the no-bake version.
Important tip: Always add the cherry topping right before serving, not before storing. This keeps the crust crisp and the filling from getting soggy. Store the cheesecake and topping separately in the fridge.
Pro Tips for Perfect Cheesecake
- Room temperature ingredients are non-negotiable. Take your cream cheese, eggs, and sour cream out of the refrigerator 2 full hours before you start. Cold cream cheese will not blend smoothly, leaving you with a lumpy batter that no amount of extra mixing will fix. Set a phone reminder if you need to.
- Mix low and slow, especially the eggs. The more air you beat into a cheesecake, the more it will puff in the oven and collapse as it cools. Add eggs on the lowest mixer speed, one at a time, and stop the moment each is incorporated.
- The secret to clean slices. Dip a long, sharp knife in hot water and wipe it dry between every single cut. The warm blade glides through the filling instead of dragging and pulling. For the cleanest presentation, slice the entire cheesecake before plating.
- Do you actually need a water bath? A water bath helps baked cheesecakes stay moist and reduces cracking. For a home baker, though, the oven-door cooling method in Step 8 above achieves most of the same benefit without the hassle of wrapping your pan in foil. Use a water bath if you want perfection; skip it if you want simplicity.
- Always use full-fat, block cream cheese. The spreadable cream cheese in a tub contains more water and stabilizers. It will give you a softer, less stable filling that may not set correctly. Block-style cream cheese (Philadelphia is the gold standard) is the right tool for this job.
- Scrape the bowl obsessively. Every time you add an ingredient, stop the mixer and scrape down the sides and bottom with a rubber spatula. Hidden pockets of unmixed cream cheese are the invisible enemy of a smooth cheesecake.
Frequently Asked Questions
Can I freeze cherry cheesecake?
Yes, both versions freeze beautifully. Wrap individual slices (without cherry topping) tightly in plastic wrap, then in aluminum foil. Freeze for up to 2 months for the no-bake version or up to 3 months for the baked version. Thaw overnight in the refrigerator, never at room temperature, as this can cause the filling to weep. Add fresh cherry topping after thawing.
How long does cherry cheesecake last in the fridge?
Covered tightly with plastic wrap or stored in an airtight container, both versions keep well for 4–5 days. The crust will soften slightly after day two, but the flavor actually deepens over time. Store the cherry topping separately and add it just before serving.
Can I make a gluten-free version?
Absolutely. Swap the graham crackers for gluten-free graham crackers or crushed gluten-free shortbread cookies. For the baked version, replace the 2 tablespoons of all-purpose flour with 2 tablespoons of cornstarch — it provides the same light binding without any gluten. The filling and cherry topping are both naturally gluten-free.
My no-bake cheesecake won’t set. What went wrong?
The most common culprits are under-whipped cream or cream that wasn’t cold enough when whipped. Make sure your heavy cream reaches stiff peaks and that your bowl and beaters are cold before you start. Also, confirm you used full-fat block cream cheese — the spreadable variety in a tub has too much moisture and won’t set firmly. If it’s still soft after 6 hours, give it a full night in the fridge before giving up on it.
Can I make this without sour cream?
Yes. Substitute full-fat Greek yogurt in an equal amount for a nearly identical result with a slightly lighter tang. You can also use heavy cream in its place for a richer, less tangy filling. Avoid low-fat substitutes, which add excess moisture to the batter and compromise the texture.
Ready to Make Something Luscious?
Whether you chill it or bake it, the result is the same: a show-stopping cherry cheesecake that looks like it took all day, even when it didn’t. Start with the No-Bake if you’re newer to cheesecakes, it will give you a real confidence boost and a dessert worth bragging about. Then tackle the Baked Classic when you’re ready to go all-in.
Both are forgiving. Both are rewarding. And at the end of the day, both are covered in cherries, which means both are perfect.
Have you given our recipe a try ?
There are no reviews yet. Be the first one to write one.
Last Updated on February 27, 2026 by Janelle

- Easy Cherry Cheesecake Recipe (Baked & No-Bake Versions) - February 27, 2026
- Cream Cheese Corn Dip: Easy Recipe Ready in 20 Minutes - January 24, 2026
- Perfect Cheesecake Cookies (Soft, Tangy & Rolled in Graham Crust) - December 27, 2025